Who's tired of this horrible heat? I know I am!
That's why I'm getting into the "Falliday Spirit" (yeah, I made that up), hoping that I can maybe get Autumn temperatures to creep up on us just a little more quickly. I've already invested in fall-scented wax melts like Dutch Apple Pie, Pumpkin Spice, and Salted Caramel, and I've busted out the box of Halloween decorations! And lucky for you, dear reader, I've also started on my fall crafts and tutorials, like this incredibly Easy Monogrammed Fall Wreath.
Today, I'm sharing with you this Halloween DIY project for creating a Spooky Floating Candle!
* This post contains affiliate links. I may be compensated if you make a purchase using the links within this post. Please view my full disclosure.
If I don't count the time it took to let the paint dry, this project took me maybe 15 minutes at the most. It's insanely simple with big results. You're sure to get lots of compliments on these spooky candles at your next Halloween bash!
What you'll need:
- Tulle spools (or paper towel rolls)
- Battery-operated tealight candles (LED)
- Hot glue-gun & glue sticks
- Black paint
- Craft fishing line
All of the materials needed can be purchased on Amazon with free Prime shipping. If you are a regular Amazon shopper and do not have Amazon Prime, I highly recommend the investment. It's $99 per year and you get free two-day shipping on millions of items. You'll save so much money on shipping! To learn more about Amazon Prime, see the end of this post, or get Amazon Prime free for thirty days. After the free trial, Prime is just $99 per year.
The reason that I chose to use tulle spools was because 1) I had them on hand after making my daughter's tutu for her costume and 2) they're much more durable than toilet paper, paper towel, or wrapping paper rolls.
First things first, I removed the top plastic part of the spool. It popped right out because it wasn't secured with adhesive. I left the bottom part in tact because it gives me something to hold while painting and therefore lessens the likelihood of a mess.
Next, you're going to want to make sure that your battery-operated tealight candles fit securely into the rolls. Luckily, most of these candles are one-size, but you'll still want to be sure. I picked up this two-pack of color-changing LED lights from Dollar Tree, but you can order a 12-pack on Amazon. Batteries are already included and because they're LED lights, there is no heat, so no fire hazard.
Install the batteries (if they aren't already installed) and flip the switch to make sure that they work properly.
Switch them off again and then push the candle right into the top of the roll.
It should be rather secure and should take a teeny bit of effort to pull back out. Remove the tealight candle and set it aside.
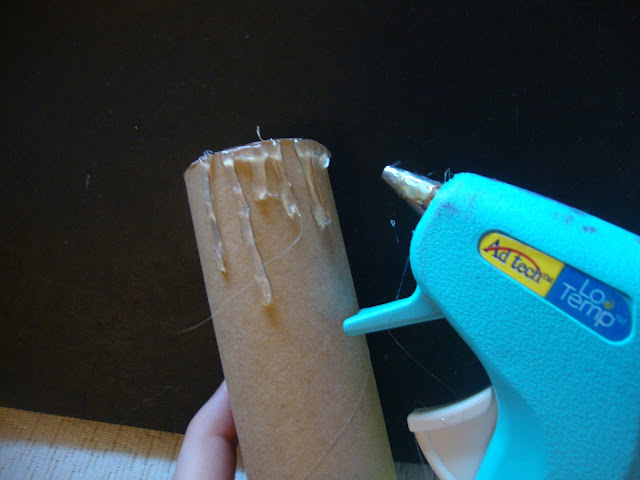
Next, start warming up that hot glue gun. Use the hot glue to add "wax" around the top edge of the candle. Don't worry about it looking perfect. Allow the glue to dry.
Once the "wax" has dried, you can begin painting. I hand-painted my candles with black acrylic paint. You can also do a blood-like effect by using a deep, rich red.
To be honest, I think that spray paint would have worked a lot better and taken less time, but I was using what I had on hand.
Once the paint has dried, they'll look something like this. You can go ahead and remove the bottom spool now.
Note: You're going to want to turn on the tealight candles before you stick them inside the cardboard OR you will need to use a long, straight-edge to switch the light on and off. That way, you won't have to remove the candle each time you want to switch it on/off.
If you'd like, you can end the project right here and just place the candles on a flat surface. However, they won't be "floating candles" if you do that, although they still look nice.
If you want to continue the project and make your candles extra spooky, you're going to need to grab that fishing line that you've got sitting around.
Why fishing line, you ask? Well, because it's super hard to see which gives the floating illusion. So hard to see, in fact, that I'm not sure you'll be able to see how I attached the fishing line in the next image.
See what I mean?
Basically, I cut about a foot of line and laid it out on my work area. I then placed the tealight candle on top of the wire, directly in the center. I then grabbed both ends of the fishing line and lifted up. I then secured the fishing line on the bottom with hot glue. I then stuck the tealight candle into the cardboard roll and tied a loop at the top.
I hope that made sense. It should look something like this.
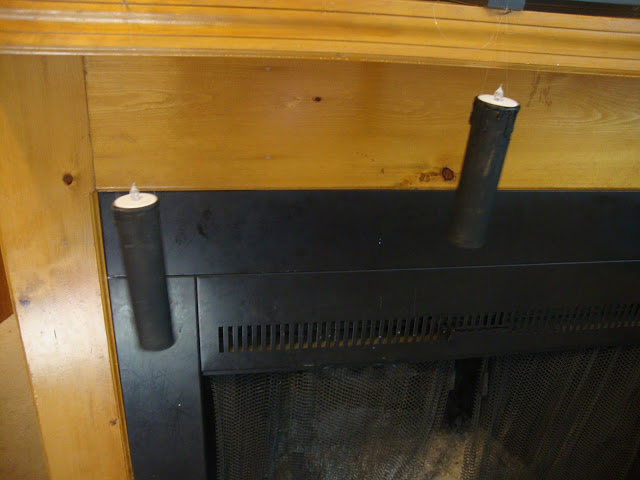
From the fishing wire, you can hang the candles. Because the fishing line is hard to see, it appears that the candles are floating.
And that's it!
Have a Happy Halloween!
A Quick Word about Amazon Prime
If you regularly shop with Amazon, you'll want to sign up for Amazon Prime. Amazon Prime is so much more than free two-day shipping. With a Prime Membership, you get:
- FREE Two-Day Shipping on millions of items
- Instant streaming of thousands of movies and TV shows
- Secure, unlimited photo storage with anywhere access
- Unlimited, ad-free access to over a million songs and hundreds of playlists
- Borrow books from the Kindle Owners' Lending Library
- Early access to select Lightning Deals on Amazon, and every event on MyHabit.com
Get Amazon Prime free for thirty days. After the free trial, Prime is just $99 per year.


No comments:
Post a Comment